Did you know that brining a turkey can increase its moisture retention by up to 40%, ensuring every bite is juicy and flavorful? Yet, many home cooks skip this step, thinking it’s too complicated or time-consuming. What if we told you that a simple turkey brine recipe could transform your holiday roast into a show-stopping centerpiece with minimal effort?
In this post, we’ll guide you through everything you need to know to create the perfect turkey brine. From the ingredients to step-by-step instructions, serving suggestions, and even healthier alternatives, this guide is your ultimate resource for mastering the art of brining. Let’s get started!
Ingredients List
The beauty of this turkey brine recipe lies in its simplicity. With just a handful of ingredients, you can create a flavorful brine that will elevate your turkey to new heights. Here’s what you’ll need:
- 1 gallon of water (divided into hot and cold portions)
- 1 cup of kosher salt (for seasoning and moisture retention)
- 1/2 cup of brown sugar (adds a touch of sweetness and caramelization)
- 1 tablespoon of black peppercorns (for a subtle spice)
- 2-3 bay leaves (adds depth of flavor)
- 4-5 garlic cloves, smashed (for aromatic richness)
- 1 lemon, sliced (adds brightness and acidity)
- 1 onion, quartered (for savory depth)
- A handful of fresh herbs (such as thyme, rosemary, or sage)
Substitutions:
- Swap brown sugar with honey or maple syrup for a different sweetness profile.
- Use apple cider vinegar instead of lemon for a tangier brine.
- Replace fresh herbs with dried herbs if fresh ones aren’t available.
Timing
Brining a turkey requires some planning, but the active time is minimal. Here’s the breakdown:
- Preparation Time: 20 minutes
- Brining Time: 12-24 hours (depending on the size of the turkey)
- Total Time: 12-24 hours
While the brining process takes time, the results are well worth the wait.
Step-by-Step Instructions
Step 1: Prepare the Brine
In a large pot, combine 1/2 gallon of hot water with the kosher salt, brown sugar, peppercorns, bay leaves, garlic, lemon slices, onion, and fresh herbs. Stir until the salt and sugar are completely dissolved.
Step 2: Cool the Brine
Add the remaining 1/2 gallon of cold water to the pot to cool the brine. You can also add a handful of ice cubes to speed up the cooling process.
Step 3: Brine the Turkey
Place your turkey in a large brining bag or container and pour the cooled brine over it, ensuring the turkey is fully submerged. Seal the bag or cover the container and refrigerate for 12-24 hours.
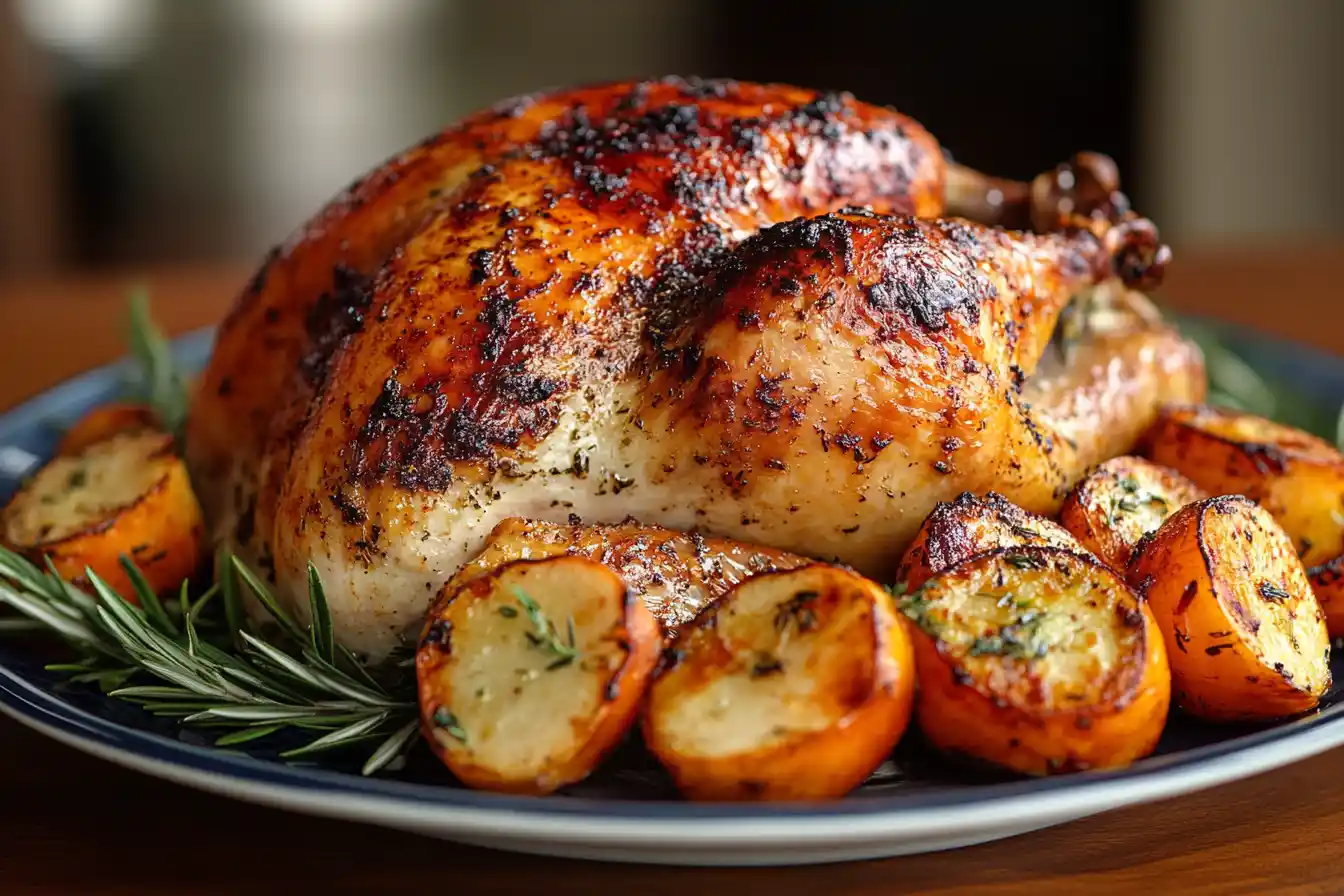
Step 4: Rinse and Roast
After brining, remove the turkey from the brine and rinse it thoroughly under cold water to remove excess salt. Pat it dry with paper towels before roasting according to your preferred method.
Nutritional Information
While the brine itself isn’t consumed, it enhances the flavor and moisture of the turkey. Here’s a quick look at the benefits:
- Juicier Meat: Brining helps the turkey retain moisture during cooking.
- Enhanced Flavor: The salt and seasonings penetrate the meat, adding depth and richness.
- Tender Texture: The brine breaks down proteins, resulting in a more tender roast.
Healthier Alternatives for the Recipe
If you’re looking to make this turkey brine recipe a bit healthier, try these tips:
- Use low-sodium salt or reduce the amount of salt for a lower-sodium option.
- Swap brown sugar with stevia or monk fruit sweetener for a low-calorie alternative.
- Add citrus zest instead of sugar for natural sweetness and flavor.
Serving Suggestions
Once your turkey is brined and roasted, the possibilities are endless. Here are some ideas:
- Serve the turkey with classic sides like mashed potatoes, gravy, and cranberry sauce.
- Use leftover turkey for sandwiches, soups, or salads.
- Pair the turkey with roasted vegetables for a complete holiday feast.
Common Mistakes to Avoid
- Over-brining: Brining for too long can make the turkey overly salty. Stick to 12-24 hours.
- Not rinsing the turkey: Failing to rinse off the brine can result in an overly salty roast.
- Using a too-small container: Ensure your turkey is fully submerged in the brine for even flavor.
Storing Tips for the Recipe
- Brining: Store the turkey in the brine in the refrigerator for up to 24 hours.
- Leftovers: Store leftover turkey in an airtight container in the fridge for up to 4 days or freeze for up to 3 months.
- Brining Liquid: Discard the brine after use, as it cannot be reused.
Conclusion
Brining a turkey is a simple yet transformative step that ensures a juicy, flavorful roast every time. With this turkey brine recipe, you’ll be able to create a holiday centerpiece that’s sure to impress your guests.
Ready to give it a try? Follow this guide and share your brining experience in the comments below. Don’t forget to subscribe for more cooking tips and recipes!
FAQs
1. Can I brine a frozen turkey?
No, the turkey must be fully thawed before brining to ensure even flavor penetration.
2. How long should I brine a turkey?
For best results, brine for 12-24 hours. Larger turkeys may require the full 24 hours.
3. Can I use table salt instead of kosher salt?
Yes, but reduce the amount by half, as table salt is denser than kosher salt.
4. Do I need to brine a pre-brined turkey?
No, pre-brined turkeys (often labeled “enhanced” or “self-basting”) do not need additional brining.
5. Can I add other spices to the brine?
Absolutely! Feel free to customize the brine with spices like cinnamon, star anise, or juniper berries for unique flavors.
By following this turkey brine recipe, you’ll be able to create a roast that’s as juicy as it is flavorful. Happy cooking!